Now Reading: How to build mason jar chandelier
-
01
How to build mason jar chandelier

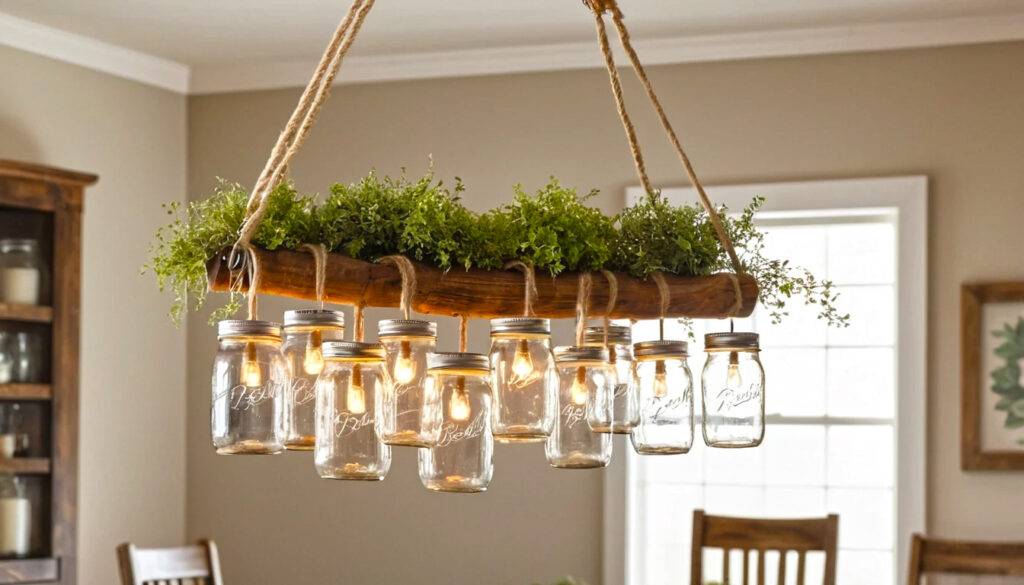
You’ve looked at an empty mason jar and thought, i could do something fabulous with that. Enter the mason jar ceiling lights renaissance. Think warm, vintage glow, farm-to-table charm, and the kind of light fixtures that make guests gasp and then ask if you sell them on ETSY. Whether you’re after a rustic jar chandelier or a sleek glass jar chandelier vibe, this project turns humble canning jars into statement lighting that’s equal parts cozy and clever.
Materials and tools
What you need (short, satisfyingly specific list)
- 6–8 regular-mouth or wide-mouth glass jars (clear, frosted, or tinted)
- Light kit with sockets and cord set (rated for ceiling use)
- Electrical canopy and chain or mounting plate
- Led bulbs (low-heat bulbs recommended)
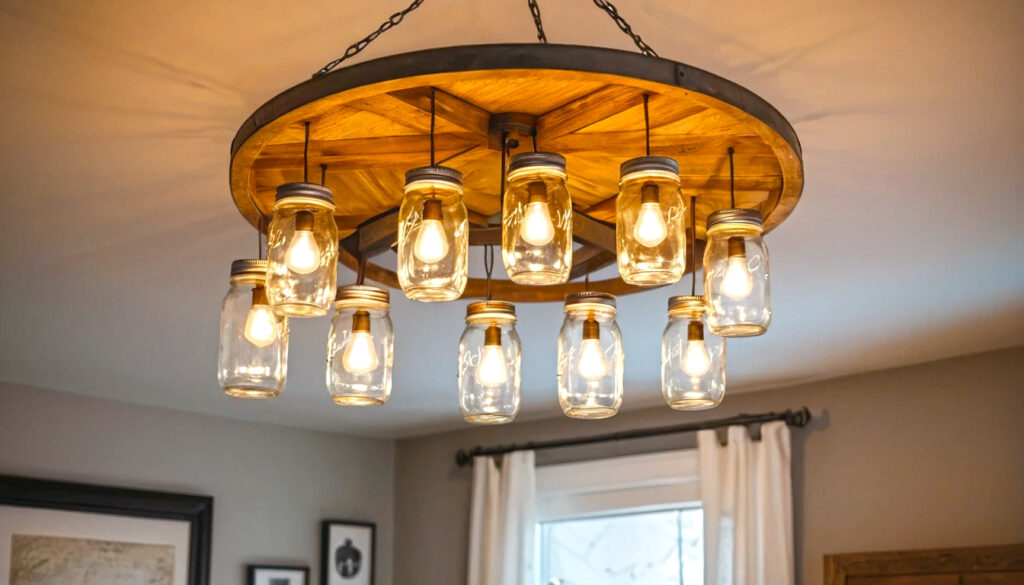
- Metal or wooden ring to mount sockets (or an old wagon wheel if you’re dramatic)
- Hose clamps or decorative metal lids with holes drilled
- Drill with glass bit (for lids only) or Pre-drilled lamp lids
- Wire nuts, wire stripper, screwdriver, tape measure
- Optional: spray paint for lids, twine, beads, hanging hardware
Tools
- Drill + glass drill bit (or purchase lids Pre-drilled)
- Pliers, screwdriver, level, ladder
- Safety glasses and gloves (because shards and ego both hurt)
Step-by-step instructions for build mason jar chandelier
- Prep the jars: wash and dry. If you want frosted glass, use etching cream or spray frost now.
- Prepare lids: either buy lamp-ready lids or carefully drill a centered hole in each lid just big enough for the socket stem. Clamp the lid in place, use slow steady pressure, and keep a bowl of water nearby to cool the bit.
- Attach sockets: feed the cord through each lid and secure the socket. Use a little silicone or plumber’s tape for extra hold if needed.
- Mounting ring setup: affix your sockets evenly around the mounting ring. Measure twice, mount once — symmetry matters unless you’re going for “abstractly asymmetrical.”
- Wiring: connect all socket wires to the main cord per the light kit instructions, using wire nuts and secure connections. If unsure, consult an electrician for ceiling hookup.
- Mount and test: attach the canopy, hang the ring, screw on the jars, insert bulbs, and turn on. Bask. Adjust jar heights if your design calls for a staggered look.
Pro tips from my workshop
Lighting is mood work. Use warm white LEDs (2700k–3000k) for a cozy glow. If you want a softer diffusion, line the jar with a thin strip of parchment or wrap the bulb in a tiny doily sleeve (do not let fabric touch the bulb unless using an enclosed, low-heat led). For an industrial twist, swap in Edison-style led bulbs. If your ceiling is high, suspend at varied lengths for depth. Measure the drop so you don’t accidentally create a hazard at head height.
Mason jar chandelier – mistakes to avoid and fixes
Mistake: drilling lids like a caffeine-fueled raccoon. Fix: go slow and keep glass cool; use masking tape to reduce chipping.
Mistake: using incandescent bulbs that cook your jars. Fix: use led bulbs — same cozy look, no heat trauma.
Mistake: uneven spacing that screams “i lost my ruler.” Fix: mark points with a compass or measuring tape; mock-up before finalizing.
Mistake: skimping on wiring safety. Fix: if your comfort level with electricity is low, hire an electrician for the ceiling hookup — you’ll sleep better and won’t be a cautionary tale.
Design variations and finishes
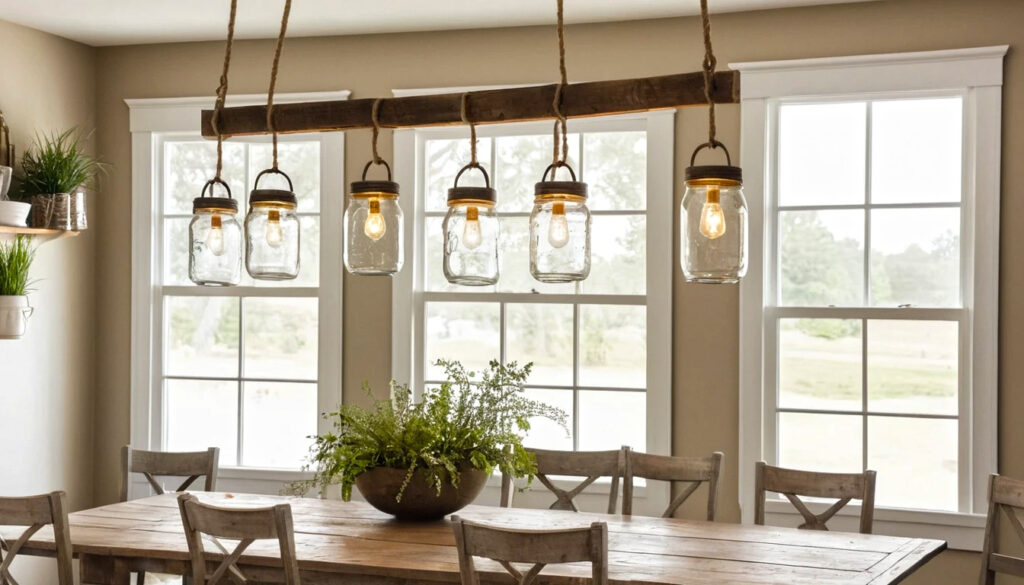
Want farmhouse? Use clear jars, distressed lids, and twine. Prefer modern? Try smoked glass jars with a chrome canopy. For a shabby-chic vibe, paint lids antique white and add lace. A cluster of small jars makes a dramatic pendant; spaced jars on a long beam serve as island lighting — true mason jar ceiling lights versatility. Swap in colored jars for a boho effect or use tinted bulbs for mood changes. If you’re aiming for a refined glass jar chandelier look, match the metal finishes and keep jar sizes consistent.
My real-life experience
I once built a jar chandelier that looked like a constellation and then realized my bulbs were too bright for binge-reading. Lesson learned. After swapping to lower-lumen LEDs and frosted one stubborn jar, the fixture went from “stop staring” to “stay awhile.” Guests loved the warmth, kids loved reaching up to tap the jars (keep them high), and my cat loved the box the jars came in more than the finished product. The pride of telling friends you wired it yourself is worth the sanding and sticker residue alone.
Final thought
If you want a centerpiece that reads handcrafted, budget-smart, and utterly charming, building your own jar chandelier is one of the best DIY adventures. It’s versatile enough to be mason jar ceiling lights in a breakfast nook, an elegant jar chandelier over a dining table, or a playful jar chandelier in a covered patio. Ready to try a DIY mason jar chandelier? Gather your jars, measure twice, and let the light do the rest. You’ll end up with a fixture that’s part art, part upcycling triumph, and all personality.